This replaces two normal unijoiners, so you can inject power anywhere (including on curves, between points, awkward spots) without needing a special feeder track section. Easy to fit with the tool included in the pack. Our best selling item!
Use it when: you want a power feed at a very specific location, or you’re retrofitting extra feeds.
Extends a standard Kato DC lead (for track feeds). Can be daisy chained for longer reaches, or use 24-834 - the longer version. Colour coded the same as power feeds.
Use it when: the controller is further away than the standard feeder lead reaches.
24-827 – 3-Way Extension Cord (older, 90cm)
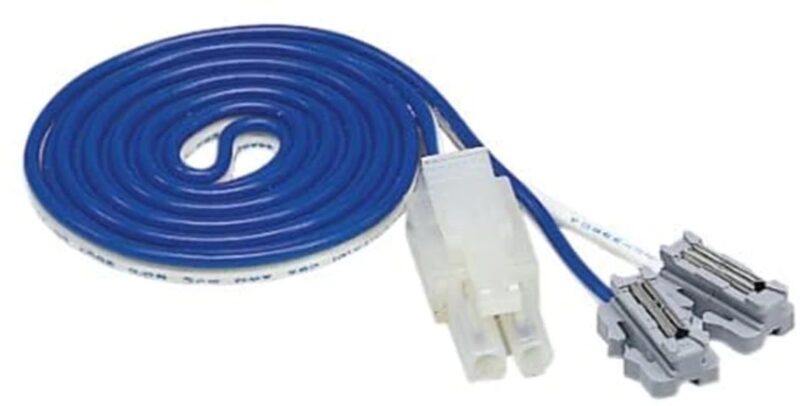
Splits one feed to up to three destinations (classic Kato “wiring bus in a box”). Now discontinued and replaced with...
The compact replacement for the 24-827 style idea: one source, up to three outputs, less cable sprawl. Colour coded for power feeds but can be used with point wiring.
Use them when: you want multiple feed points without building a soldered bus.
This is the “bridge cable” that lets you connect Kato feeder leads to the screw terminals / outputs of another brand’s controller. Ideal for a DCC controller.
Use it when: you like Unitrack, but you’re not using a Kato Power Pack.
The flick switch that throws Kato Unitrack points with a satisfying clunk. Multiple switches can daisy-chain and (with Kato power packs) clip onto the side of the controller. Previously made in blue, now only available in black.
You can flick multiple points by connecting them with the 84-833 to the output of the switch.
This is the “make Kato turnout switches work from a non-Kato supply” piece. It’s commonly used to power 24-840BK turnout control switches from another controller’s accessory output / suitable supply. The switches click on the side.
Use it when: you want the Kato push-button turnout system, but your controller isn’t Kato.
7) Accessory power for signals and similar
24-829BK – Accessory Adapter (for Kato power pack)
Plugs onto the side snap terminals and provides the correct connection point for certain accessories (notably the old style signal power supply). Another one previously made in blue, now only available in black. (Often described as “DC/AC converter” by some retailers)
What it actually does:
It’s the little interface piece that lets you take power from the Kato power pack’s accessory side and feed it into the signal power ecosystem, or other things that use 12V power.
What it’s for, in real terms
It gives you a proper plug connection for accessories (most commonly the 24-844), so you’re not improvising with odd terminals or non-matching plugs. Kato also state the 24-844 connects to the output of 24-829 when used with a Kato Power Pack.
24-844 – Automatic Three-Colour Signal Power Supply
Powers up to three compatible old style Kato automatic 3-colour signal tracks/signals, via the 24-829 when used with a Kato power pack.
24-845 – Automatic Signal Extension Cord
Extension lead for the 24-844 → signal connection, also handy as a compatible plug lead in a pinch.
24-826 – AC Extension Cord (approx 90cm / 35")
An extension cord intended for accessory/control power wiring (separate from the DC track-feed extension).
Inline on/off control for a feeder, so you can kill power to a siding/section without unplugging anything. Previously made in blue, now only available in black.
What it actually is
A simple in-line on/off switch for a Kato two-wire track feeder. It sits between your controller (or splitter) and the feeder lead that powers a specific bit of track. Kato describe it as a way to turn feeders on/off so you can isolate sections, and they specifically call out use with Turntable Extension Tracks.
What it is not
It doesn’t create isolation by itself. The track section must already be electrically separate (gapped), otherwise power will just sneak in from elsewhere.
It’s not a turnout controller (that’s 24-840BK).
It’s not a selector that routes one controller output to multiple sections; it’s just “this feed is live / this feed is dead”.
The key concept: “switched feeder” + “gapped boundaries”
To use 24-850BK properly, you do two things:
Gap the section you want to control (usually both rails at the boundary).
Provide that section with its own feeder, and run that feeder through the 24-850BK.
Kato’s own wording is basically “switching feeders to isolate track sections” — the switching is on the feeder, not on the rail joiners.
Typical wiring (plain English)
Controller track output → 24-850 → feeder to isolated section
That feeder can be:
a feeder track (e.g., S62F), or
terminal unijoiners placed exactly where you want the feed.
Common use cases (and how to wire them)
1) Parking siding / “engine shed road”
Gap the siding at the join from the running line.
Put a feeder in the siding.
Run the feeder through a 24-850BK.
Switch off = train stays parked, switch on = drive out.
2) Yard with multiple storage roads Do not rely on one cut-off at the yard throat unless every road is properly isolated.
Best practice: each storage road has its own gaps + its own feeder + its own 24-850BK.
If you want tidy wiring, split one supply to multiple switched feeders using a Kato splitter, then put a 24-850BK on each branch.
3) Turntable / roundhouse stalls This is where 24-850BK makes immediate sense.
Each stall track (or approach/extension track) is treated as a separate “section”.
Each section gets a feeder, and that feeder is switched by a 24-850.
Then you can make only the track you’re using “live”, and keep everything else dead. Kato explicitly flags turntable extension track use for the 24-850BK.
Gotchas that bite people
Back-feeding: If a “dead” section is still connected elsewhere (another feeder, metal joiners, a crossover, etc.), it won’t be dead.
Only gapping one rail: sometimes you still get weird behaviour (especially with lighting, sound, stay-alives, or stock bridging). For a clean isolate, treat it as a full section break.
DCC note: 24-850BK still works fine for turning sections off, but it won’t solve reversing on DCC (that needs an auto-reverser; 24-851BK is the DC-era approach).
Polarity reversal for a feeder — the simple Kato solution for DC reversing sections/loops including turntables in certain circumstances. Previously made in blue, now only available in black.
9) The small connectors that quietly matter
24-815 – Unijoiners (standard)
The normal conductive joiners that carry power across Unitrack. With a lot of connecting and re-connecting they can wear out and need replacement.
24-816 – Insulated Unijoiners
These break electrical continuity while still physically joining track — key for isolating sections and for reversing-loop boundaries (with the right switching).
10) Quick “which part do I need?” cheat sheet
I need to feed power onto the track
Put it on a specific straight: 20-041
Put it literally anywhere: 24-818
My controller is too far away
Extend track-feed wiring: 24-833
I want extra feed points without a soldered bus
Split to 3: 24-833
I’m using a non-Kato controller
Connect to Kato feeder leads: 24-843
Power Kato turnout switches from non-Kato supply: 24-842
I want to control points
Button switch: 24-840BK
Longer run to the point: 24-841
Spare turnout lead: 24-84TC
I want to switch a siding on/off
24-850BK
I need a reversing loop in DC
24-851BK (and insulated gaps via 24-816)
Basket
Exclusively Kato!
Unitrack, Unitram and buildings.
Locomotives and Rolling Stock, North American and Japanese outline